Answered by a licensed electrician
Can Level 2 chargers go outside?
Quick answer
Yes. A Level 2 EV charger can be installed outside in Ontario if the charger is approved for outdoor use, the wiring is weather-protected, and the installation is filed with ESA where required. In the GTA, most homeowners land between $1,500 and $3,000 all-in for a typical Level 2 installation.
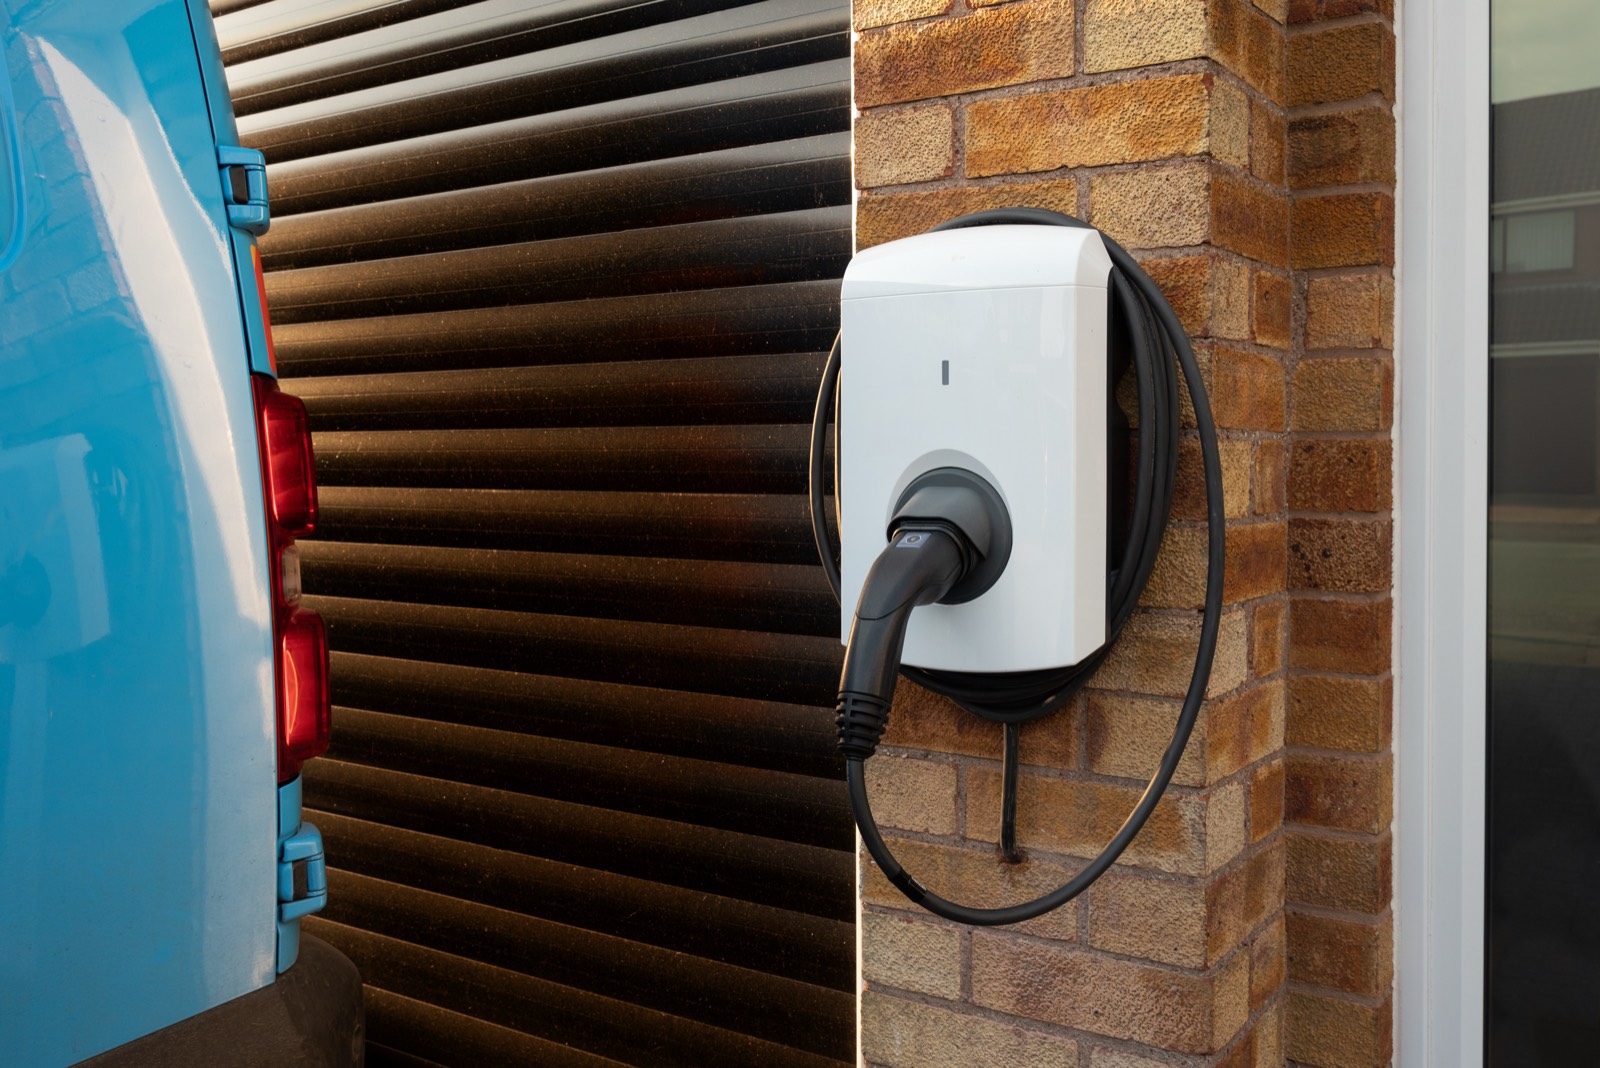
Yes — Level 2 chargers can go outside, but the charger, wiring method, mounting, and inspection all have to match an exterior wet-location installation. A driveway charger is not just an indoor unit screwed to brick. It needs outdoor-rated equipment, protected cable or conduit, a proper dedicated circuit, and a layout that still works when the driveway is full of snow.
For many Toronto and GTA homes, outdoor charging is the normal solution: no garage, a shared driveway, a front-pad permit, or a detached parking spot beside the house. Done properly, it is safe, clean, and convenient. Done casually, it becomes a tripping hazard, a water-entry problem, or a nuisance every winter morning.
City Power installs Level 2 EV chargers across Toronto and the GTA, and files ESA notifications where required under our Licensed Electrical Contractor licence, ECRA/ESA #7015314.
Use a charger approved for outdoor Canadian conditions
Use a charger that is specifically labelled for outdoor installation in Canada, not just a charger that “looks sealed.” The marking matters because the unit has to tolerate rain, wind-driven snow, freezing temperatures, UV exposure, and repeated heating from high-current charging.
When we assess an outdoor charger, we look for the manufacturer’s approval marks and installation instructions. The charger should be certified for Canadian use and rated by the manufacturer for the location where it will be mounted. Many common home chargers are suitable for outdoor use, but not every plug-in EVSE, receptacle cover, or low-cost online unit belongs on a driveway wall.
For an exterior installation, the details we check include:
- The charger is marked for outdoor or wet-location use.
- The operating temperature range suits Ontario winter and summer conditions.
- The cable remains flexible enough for cold-weather handling.
- The connector holster sheds water and does not hold snow against the pins.
- The enclosure can be mounted in the orientation the manufacturer requires.
- The unit is compatible with hardwired installation if that is the safer exterior method.
The charger’s own rating does not protect every other part of the job. The branch circuit, fittings, connectors, boxes, and fasteners also need to be suitable for exterior exposure. A weather-rated charger connected through the wrong connector or an unsealed wall penetration is still a bad installation.
If you are still choosing equipment, compare outdoor suitability, cable length, app features, and hardwire options before buying. Our Canadian EV charger selection guide is a useful starting point, but the final choice should still be checked against your panel capacity and parking layout.
Mount it where the cord reaches without crossing a walkway
The best outdoor charger location is close enough to the vehicle’s charge port that the cord reaches easily, without lying across steps, a public sidewalk, a shared path, or the main walking route to the door. This is where many driveway installs succeed or fail.
A 7.2 kW or 9.6 kW charger is only convenient if you can plug in without dragging a cable through slush or stretching it around a bumper. Before we pick the wall location, we ask where the vehicle normally parks, whether it pulls in or backs in, where the charge port is, and whether a second EV is likely later.
Common outdoor mounting options include:
| Location | Best use | Watch for |
|---|---|---|
| Exterior wall beside driveway | Attached or semi-detached homes | Cord crossing side door, hose bibs, gas meter clearance |
| Front wall near parking pad | Homes with legal front-yard parking | Public walkway and cable visibility |
| Side wall near shared drive | Narrow Toronto driveways | Neighbour access and snow piling |
| Post or pedestal | Detached parking spot or no nearby wall | Trenching, bollard protection, snowplow impact |
| Detached garage exterior | Rear-lane or backyard parking | Feeder capacity to garage and voltage drop |
Cable management is part of the electrical design, not an afterthought. The charger should have a holster or hook that keeps the cable off the ground, clear of tires, and above normal snow accumulation. In winter, a cable left in a frozen coil can be awkward to handle and easier to damage by shovel, snowblower, or vehicle tire.
We also avoid mounting the unit where roof runoff, icicles, or packed snow from a plow will hit it every storm. A charger can be outdoor-rated and still be poorly placed. A sheltered wall location is often better than the absolute shortest wiring route.
If the best parking spot is far from the panel, distance affects wire size, conduit routing, and labour. For planning that situation, see how far an EV charger can be from the panel.
Protect the wiring, conduit, wall penetration, and access
Outdoor Level 2 wiring must be mechanically protected and weather-protected from the panel to the charger. That usually means a dedicated 240V circuit, properly sized conductors, exterior-rated conduit or cable methods, sealed fittings, and a clean transition through the wall.
A typical exterior route may include a run from the electrical panel, through a basement or garage, out through the foundation or wall, then along brick, siding, or conduit to the charger. Every change in environment matters. Indoor cable methods do not automatically continue outside. Exterior conduit needs proper straps, expansion considerations where needed, and fittings that do not funnel water into the wall.
Specific outdoor details we pay attention to include:
- Drilling the wall penetration on a slight slope or sealing it so water cannot track inside.
- Using exterior-rated fittings, boxes, and connectors where exposed.
- Keeping conduit out of easy impact zones from vehicles, bins, and shovels.
- Avoiding low mounting that gets buried by snowbanks.
- Maintaining access to the charger, breaker, and any required disconnecting means.
- Labelling the circuit clearly at the panel.
Most Level 2 chargers need their own dedicated circuit. That is not optional sharing with a dryer, range, or outdoor receptacle. The breaker size, conductor size, charger setting, and continuous-load rules all have to match. If the panel is close to capacity, we may recommend load management instead of automatically moving to a larger service.
For more on circuit requirements, see whether EV chargers need dedicated breakers.
Access is another practical issue. The charger should be reachable for daily use, but the electrical equipment also needs to be serviceable. If a disconnect is required or advisable for the layout, it should not be hidden behind stored items, a locked fence, or a snow pile. The same goes for the panel: an ESA inspector and future electrician need clear access to verify the installation.
Hardwired is usually the cleaner outdoor choice
For outdoor Level 2 charging, hardwired installation is usually cleaner and more durable than a plug-in receptacle, especially on an exposed wall. A hardwired unit removes one weather-exposed plug-and-receptacle connection and often gives a neater, more secure result.
Plug-in chargers can be useful in some situations, but outdoor 240V receptacles need the correct weatherproof enclosure, proper in-use cover, GFCI protection where required, and a mounting location that keeps the heavy cord supported. They also introduce more points where water, corrosion, looseness, or nuisance tripping can become a problem.
A hardwired installation is not automatically higher capacity, but it often allows the charger to be set up exactly for the circuit and panel capacity. The installer can torque terminations to the manufacturer’s specification, set the charger’s output limit, and close the enclosure as intended.
Outdoor cost depends heavily on distance and finish. If the panel is nearby and capacity is available, a straightforward GTA installation is often in the $800–$1,500 range for labour, materials, and ESA notification. Longer runs, finished walls, trenching, or difficult exterior routing can bring the installation into the $1,500–$3,500 range before the charger cost itself. Most homeowners end up around $1,500–$3,000 all-in for a typical Level 2 setup.
If you are comparing an exterior driveway charger with a garage location, the garage may be simpler — but not always. A garage on the opposite side of the house can cost more than a short exterior wall run. See whether EV chargers can be installed in garages for that comparison.
Winter use depends on placement, cable handling, and inspection quality
Outdoor Level 2 chargers work in Ontario winter when the equipment is rated for it and the cable is kept usable. Cold weather mainly affects comfort, charging speed commanded by the vehicle, and cable handling — not the basic ability of a properly installed charger to operate.
The vehicle may spend some energy warming the battery before or during charging. That is normal. The charger still supplies power; the car decides how much it can accept based on battery temperature and state of charge. A Level 2 charger is especially helpful outdoors because it can precondition the battery and cabin while the car is still plugged in.
Winter-ready cable management matters more than many homeowners expect. A good setup keeps the cable:
- Off the driveway surface where it can freeze into slush.
- Away from snowblower and shovel paths.
- High enough that snowbanks do not bury the connector.
- Looped loosely, not tightly kinked in freezing weather.
- Clear of tires when the vehicle pulls in or backs out.
We also recommend thinking about lighting. If the charger is beside a dark driveway, a small exterior light or existing fixture placement can make plugging in safer at night. It is a small detail, but it matters in January when the cable, charge port, and snow are all the same colour.
ESA inspection is the final check that the installation was not just convenient, but compliant. The inspector may verify the breaker, conductor size, wiring method, bonding/grounding, equipment approval, exterior protection, and whether the installation follows the manufacturer’s instructions. If the charger output is adjustable, the setting must match the installed circuit.
For cold-weather charging behaviour, see do EV chargers work in winter. For an outdoor driveway quote, City Power provides free written estimates and can plan the charger location, circuit route, ESA notification, and inspection together instead of treating them as separate guesses.
Want a licensed electrician to take a look?
Free written quote, usually the same day. ESA permits handled.
People also ask
Is an outdoor EV charger safe in rain and snow?
Yes, if the charger and all exterior wiring parts are approved for outdoor wet-location use and installed to the manufacturer’s instructions. The risk is not normal rain; it is using indoor-rated equipment, poor sealing, damaged conduit, or a connector left on the ground. A proper installation keeps water out and keeps the cable supported.
Should an outdoor Level 2 charger be hardwired or plugged in?
Hardwired is usually the better outdoor choice because it removes the exposed plug-and-receptacle connection and gives a cleaner, more permanent installation. A plug-in setup can be done, but it needs the correct 240V receptacle, weatherproof in-use cover, GFCI protection where required, and solid cable support.
Can I mount a Level 2 charger on a post in the driveway?
Yes, a post or pedestal can work when there is no suitable wall near the parking spot. The post needs a proper base, protected wiring, weather-rated equipment, and protection from vehicle impact or snow clearing. Trenching and conduit routing often make post-mounted chargers more involved than wall-mounted chargers.
Do outdoor EV chargers need an ESA inspection in Ontario?
Most new Level 2 charger installations require an ESA notification by a Licensed Electrical Contractor, followed by inspection where ESA requires it. The inspection confirms the circuit, breaker, conductor size, wiring method, equipment approval, and charger settings. It also gives documentation for insurance, resale, and future service work.