Cost Guide
Subpanel Installation Cost in Ontario
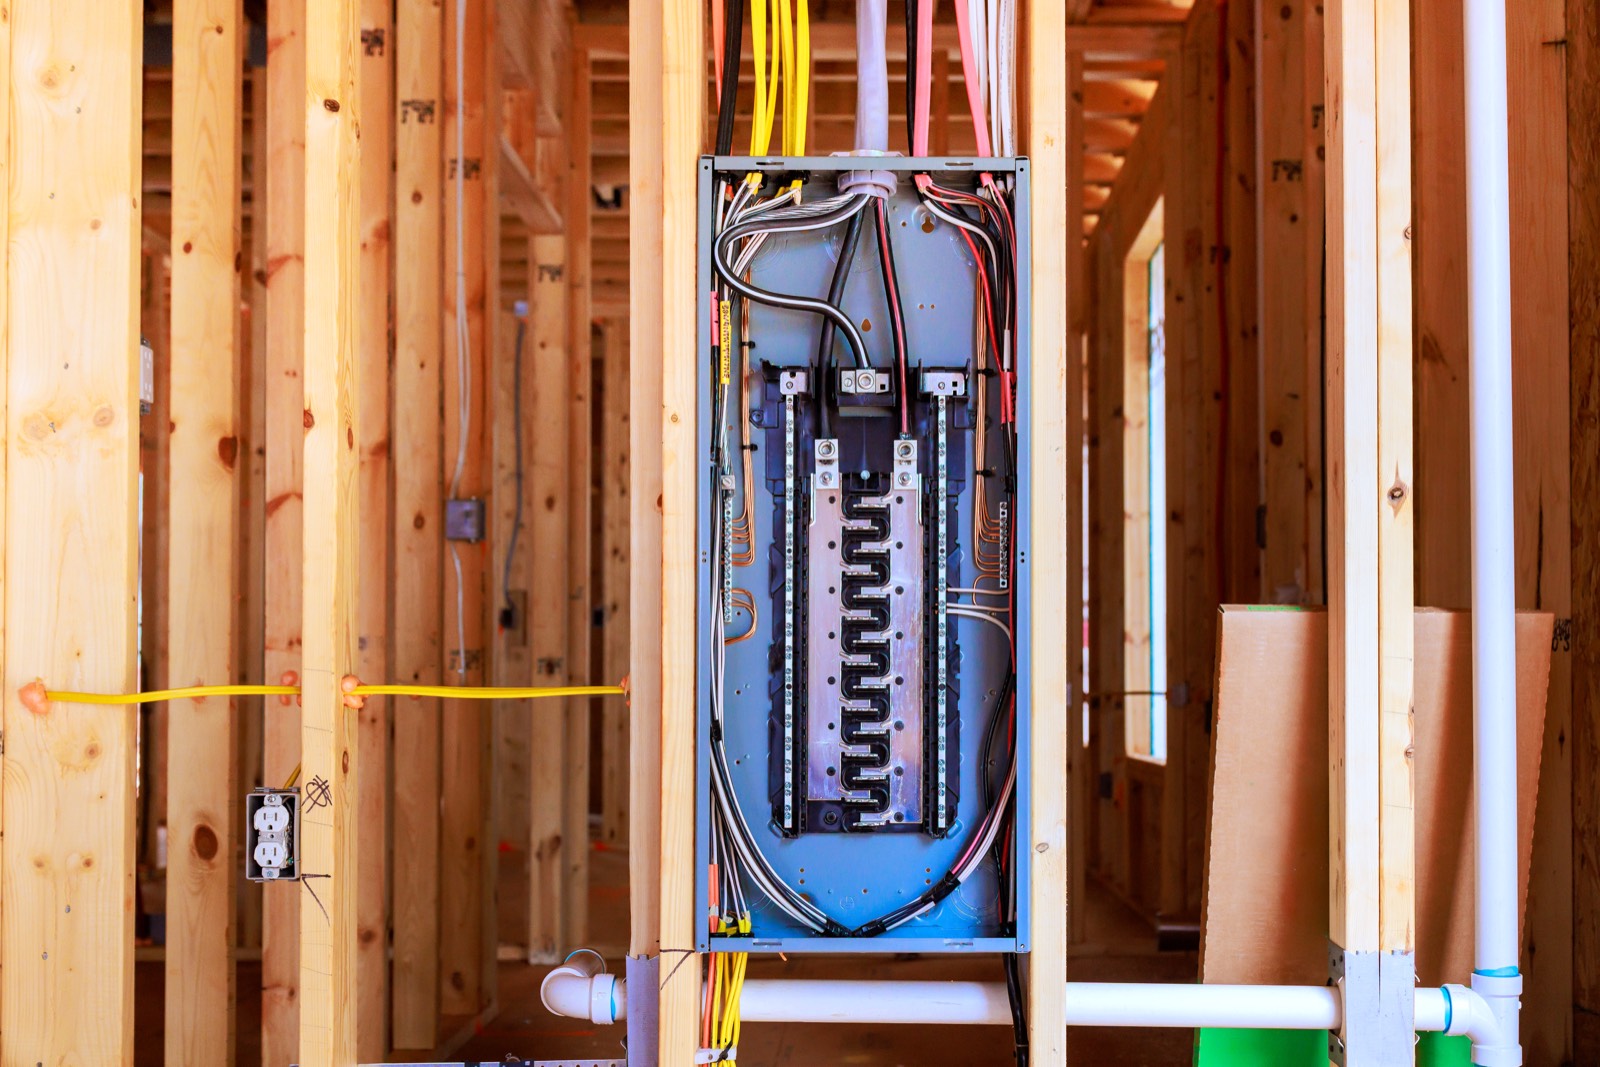
A subpanel is useful when the main panel is crowded or the electrical loads are physically far away: a garage workshop, addition, basement suite rough-in, EV charger area, pool equipment shed, or detached outbuilding. It gives you a local breaker panel fed from the main panel, so new circuits can be added without running every cable back across the house.
The important limit: a subpanel does not create more power. If the home’s service is already maxed out, the right answer may be a panel and service upgrade, not another panel.
Subpanel cost in Ontario depends on size, feeder route, and available capacity
A simple 60A or 100A subpanel added during a larger renovation can be far less work than a standalone subpanel pulled through finished walls. The panel itself is only one part of the job. The feeder cable, breaker space in the main panel, wall access, grounding and bonding details, ESA notification, and inspection all affect the quote.
Here are the published price references we can state. Where a subpanel situation falls outside those published bands, it is quoted in writing after a site visit.
| Scope or cost driver | What changes the number | Published pricing |
|---|---|---|
| 60A or 100A subpanel added to a project | Main panel access, feeder length, wall finish, breaker availability, location of the new panel | A 60A or 100A sub-panel adds $800–$1,500 to the project |
| Standalone subpanel installation | Existing panel condition, feeder path, finished walls, panel location, load calculation, detached structure requirements | Quoted in writing after a site visit |
| Feeder distance and routing | Open joists versus finished ceiling, trenching to a detached garage, conduit, fire separations, mechanical rooms | Quoted in writing after a site visit |
| Typical 20A dedicated circuit instead of a subpanel | One new circuit from the main panel may solve a freezer, tool, microwave, or office-load problem | For subpanel projects in Ontario, adding a standard 20A dedicated circuit from the panel is usually $250–$500, depending on the run length and whether walls are finished along the path. |
| Heavier 30A–50A circuit instead of a subpanel | Dryer, range, hot tub, EV charger, or large equipment circuit | Larger 30A–50A circuits for loads like dryers, ranges, hot tubs, or EV chargers typically cost $400–$900. |
| 100A-to-200A service upgrade instead of a subpanel | Needed when the service calculation shows the home does not have enough capacity | A 100A-to-200A panel upgrade in the GTA typically costs $3,200–$4,500 including the panel, labour, ESA permit, and inspection |
| ESA notification fee | Common residential jobs vary with scope | Fees for typical residential jobs run $100–$200 and are normally baked into your quote |
For many homes, the decision is not simply subpanel versus no subpanel. It is one of three routes:
- Add one dedicated circuit.
- Add a subpanel fed from the existing service.
- Upgrade the service, then add circuits or a subpanel with enough headroom.
That is why an accurate quote starts with the main panel, not the garage or addition alone.
A subpanel helps with distribution, not service capacity
A subpanel is the right tool when the home has enough electrical capacity but the existing panel layout is impractical.
Common examples:
- A detached garage needs several 120V circuits for tools, lights, a door opener, and a heater control.
- A basement renovation has many new branch circuits and the main panel is far away.
- A workshop needs local breaker access instead of long runs back to the house panel.
- An addition has lighting, receptacles, HVAC controls, and exterior loads grouped in one area.
- Pool or spa equipment needs a clean separation between house circuits and outdoor equipment circuits.
In those cases, the subpanel acts like a local distribution point. One correctly sized feeder leaves the main panel and supplies the new panel. From there, branch circuits serve the local loads.
A subpanel is not the fix when the house service is undersized. If the load calculation is already tight because of electric heat, a range, dryer, hot tub, EV charger, sauna, basement apartment, or future generator transfer equipment, adding a subpanel may only make the panel look tidier while leaving the same capacity problem behind.
That is where we discuss upgrade alternatives through our panel upgrade service. The service size, main breaker, utility supply, meter base, grounding, and load calculation matter more than the number of empty breaker spaces.
A good rule: if you only need one new appliance or one new equipment feed, compare a subpanel with a dedicated circuit installation cost. If you need a cluster of circuits in one remote area, a subpanel may be cleaner. If the calculated load exceeds what the existing service can safely supply, the service needs to be addressed first.
Feeder size and route are the biggest labour variables
The feeder is the cable or conduit run from the main panel to the subpanel. It usually includes two ungrounded conductors, one neutral, and one bonding conductor. The feeder must be sized for the subpanel rating, the breaker protecting it, the conductor material, the installation method, and the expected load.
This is where subpanel quotes vary.
A subpanel close to the main panel in an unfinished mechanical room is a different job from a subpanel in a detached garage across a finished basement, exterior wall, driveway, and trench. The panel size may be the same, but the route is not.
We look at:
- Feeder amperage. A small workshop panel and a larger garage or addition panel may need different feeder sizes.
- Main panel breaker space. The main panel needs an appropriate breaker position and compatible breaker type.
- Cable protection. Feeder conductors may need conduit, sleeving, mechanical protection, or special routing through unfinished and finished areas.
- Finished surfaces. Drywall, plaster, tile, built-ins, and finished ceilings add time because the route must be planned carefully.
- Detached structures. Garages and sheds can require extra attention to bonding, grounding, underground wiring methods, and exterior disconnecting arrangements under the Ontario Electrical Safety Code.
- Voltage drop and distance. Longer feeders may require different planning so equipment receives proper voltage under load.
This is also why photos are helpful but not always enough. A written quote often requires checking the main panel, the route, the proposed panel location, and the actual equipment you plan to run.
If the goal is a garage EV charger or hot tub, the answer may be a heavier branch circuit, a load-management option, a subpanel, or a service upgrade. The safe route depends on the load calculation and the OESC requirements for that equipment.
Panel location, grounding, and bonding must be right
A subpanel must be accessible, protected, and installed in a location that ESA can approve. It should not be buried behind storage shelves, blocked by appliances, squeezed into a damp corner, or installed where it is likely to be hit by vehicles or equipment.
Good locations have:
- Clear working space in front of the panel.
- A dry, accessible wall surface.
- A route for the feeder that does not create unnecessary damage.
- Protection from impact in garages, workshops, and storage rooms.
- Enough room for a neat panel directory and future service access.
The grounding and bonding details are not optional. In a typical subpanel, the neutral bar must be isolated from the bonding path. The bonding conductor must be connected correctly. The feeder breaker, panel rating, lugs, conductor size, and terminations all have to match.
Detached structures add another layer. The electrician has to confirm the required grounding and bonding arrangement for that building and the wiring method used to feed it. A detached garage panel is not treated the same way as a subpanel mounted beside the main panel in a basement.
This is one reason we do not recommend handyman subpanel work. A subpanel can look neat from the outside while hiding serious issues inside: neutral and bond tied together in the wrong place, undersized feeder conductors, incompatible breakers, missing bushings, loose lugs, no mechanical protection, or outdoor wiring that is not rated for the location.
Those errors may not trip a breaker right away. They show up later as shock risk, nuisance tripping, overheated connections, failed equipment, or an ESA correction notice.
ESA inspection is part of doing the job properly
In Ontario, subpanel work requires the right electrical licence, ESA notification where required, and inspection. For subpanel installation in Ontario, City Power Electrical Services works as a Licensed Electrical Contractor, ECRA/ESA #7015314, with ESA permits and inspections handled where required.
For a subpanel, ESA may review items such as:
- Correct feeder conductor size and breaker protection.
- Panel rating and approved equipment.
- Neutral isolation in the subpanel.
- Proper bonding path and grounding arrangement.
- Cable support, protection, connectors, bushings, and conduit details.
- Working clearance and panel accessibility.
- Breaker compatibility with the panel.
- Circuit directory and labelling.
- GFCI or AFCI protection where required for new branch circuits.
- Outdoor, garage, trench, or detached-building wiring methods where applicable.
The inspection is not a nuisance step. It is the documentation that the work was done under the Ontario system, by a licensed contractor, and checked against the applicable requirements. That matters for insurance, resale, renovation records, and future troubleshooting.
If you are comparing quotes, make sure the ESA notification is included in writing. A cheaper number that excludes the notification, inspection, cleanup, or final labelling is not the same scope. For broader context on what inspectors look for, see our electrical inspection cost guide.
How to get an accurate subpanel quote
The fastest way to get a useful quote is to show the actual load and the actual route. A vague request for a garage subpanel can mean anything from a few general-use receptacles to a workshop with large tools, heat, EV charging, and exterior loads.
Before the site visit, gather:
- A clear photo of the main panel with the door open.
- A photo of the panel label and breaker directory, if readable.
- The distance from the main panel to the proposed subpanel location.
- Whether the route is unfinished, partially finished, or fully finished.
- The equipment you want to run now.
- The equipment you may add later.
- Whether the subpanel is in the same building or a detached garage, shed, or workshop.
- Any renovation drawings, if this is part of an addition or basement project.
During the visit, we check the existing service, main panel condition, available breaker positions, grounding and bonding, feeder path, wall access, and the proposed loads. If the main service has enough capacity, we can price the subpanel scope. If it does not, we will explain why a service upgrade or a different design is safer.
A smaller job may be better solved by an outlet or dedicated circuit. For example, a freezer, sump pump, microwave, or office equipment load may not need a subpanel at all. You can compare related smaller scopes in our outlet installation cost guide.
If you are planning several upgrades at once, it is worth designing them together. A subpanel, surge protection, generator transfer equipment, EV charger, workshop circuits, and future addition loads all interact with the main service. Planning the layout once is cleaner than adding equipment one piece at a time and running out of space or capacity later.
City Power provides free written estimates, serves Toronto and the GTA, and includes full cleanup. Call 416-837-4038 to book a site visit for a written subpanel quote.
Want a licensed electrician to take a look?
Free written quote, usually the same day. ESA permits handled.